To install a gutter drainage pipe, first calculate your drainage area and plan your route. Call 811 to mark utilities before digging a trench with a 0.5-inch per foot slope. Place your catch basin at the lowest point on a gravel base, then connect PVC drainage pipes using appropriate fittings. Direct the discharge point away from your foundation, following local regulations. Maintain your system with biannual inspections and cleaning. The following steps will guarantee proper water management for years to come.
Key Takeaways
- Call 811 for utility marking before digging your drainage trench to prevent damage to underground utilities.
- Maintain a consistent slope of 0.5 inches per foot to ensure proper water flow and prevent pooling.
- Connect downspouts to drainage pipes using appropriate fittings and waterproof sealant for leak-free operation.
- Install a catch basin at the lowest point on a gravel base to collect water and filter debris.
- Design discharge points at least 3 feet from foundations with pop-up emitters or dispersal methods for proper drainage.
Planning Your Drainage System

Before you pick up any tools or purchase materials, proper planning of your gutter drainage system is critical for effectively managing rainwater runoff from your roof.
Begin by calculating your drainage area, measuring your entire roof surface to determine required gutter capacity. Consider local rainfall intensity patterns to guarantee your system can handle heavy downpours.
Identify natural low points on your property where water naturally flows, as these are ideal locations for downspout placement. Consult building codes for specific requirements in your region.
Evaluate your roof’s slope and type, as these factors affect water flow rates and gutter design decisions. Additionally, consider incorporating stormwater management techniques to further enhance your drainage system’s efficiency.
Gathering Tools and Materials
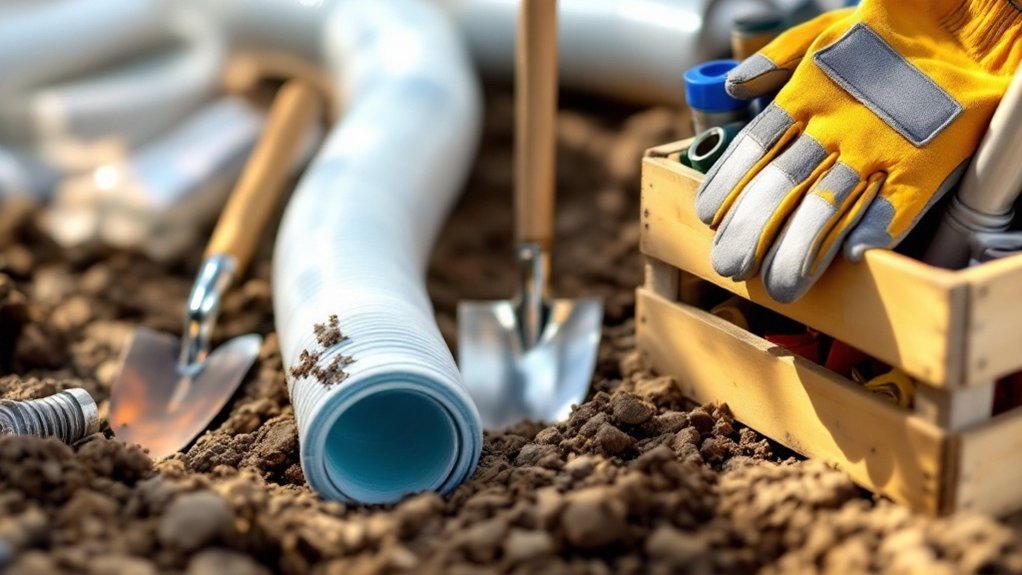
Before beginning your gutter drainage pipe installation, you’ll need to assemble specific tools including a tape measure, tin snips, screwdriver, level, and caulking gun for efficient and precise work.
Select appropriate materials such as downspouts, elbows, connectors, PVC pipes, and brackets that match your existing gutter system and drainage requirements.
Don’t forget essential supplies like PVC cement, sealants, and safety equipment to guarantee proper joint preparation and personal protection throughout the installation process.
Essential Tools Checklist
A successful gutter drainage pipe installation requires five categories of tools and materials that you’ll need to gather before breaking ground.
Begin with measuring tools like tape measures and levels for precise alignment.
Add cutting implements such as tin snips and hacksaws, maintaining sharp edges for clean cuts.
Fastening tools—drills, screwdrivers, and appropriate screws—secure your system permanently.
Don’t forget pipe components including downspout sections, elbows, and adapters for proper water routing.
Finally, prioritize tool safety with protective gear: gloves, safety glasses, and sturdy footwear to prevent injuries when handling sharp metal edges and operating cutting tools.
Material Selection Guide
With your tools assembled, selecting the right pipe materials becomes your next priority for a successful gutter drainage installation.
PVC offers excellent pipe longevity and moderate material cost, with standard 4-inch diameters providing sufficient capacity for most homes.
For yards with obstacles or soil movement, consider flexible corrugated HDPE pipes, which navigate around existing features without joints.
Always choose solid, not perforated, pipes for downspout drainage to prevent water seepage near your foundation.
For visible sections, aluminum or copper downspouts might justify their higher cost for aesthetic appeal, while underground portions typically benefit from cost-effective PVC or HDPE’s durability in aggressive soils.
Marking and Preparing the Layout
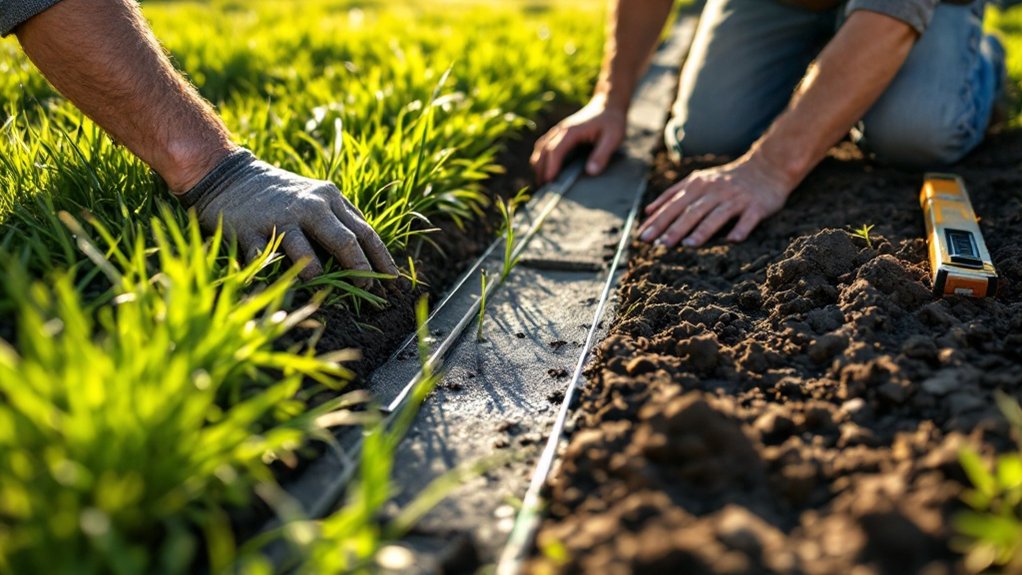
Once you’ve decided to install a gutter drainage pipe, proper layout planning becomes your critical first step.
Begin by calling 811 to request utility marking—this free, legally required service prevents costly damages during excavation. While waiting, conduct a thorough site survey to assess land slope, soil type, and rainfall patterns.
Always call 811 before digging—it’s free, required by law, and essential for preventing damage to underground utilities.
Map your pipe route carefully, measuring distances from structures and identifying obstacles. You’ll need stakes, string, and a level to mark the trench path, ensuring proper slope for effective drainage.
Finally, verify compliance with local regulations—check building codes for required pipe materials and sizes, and obtain necessary permits before breaking ground.
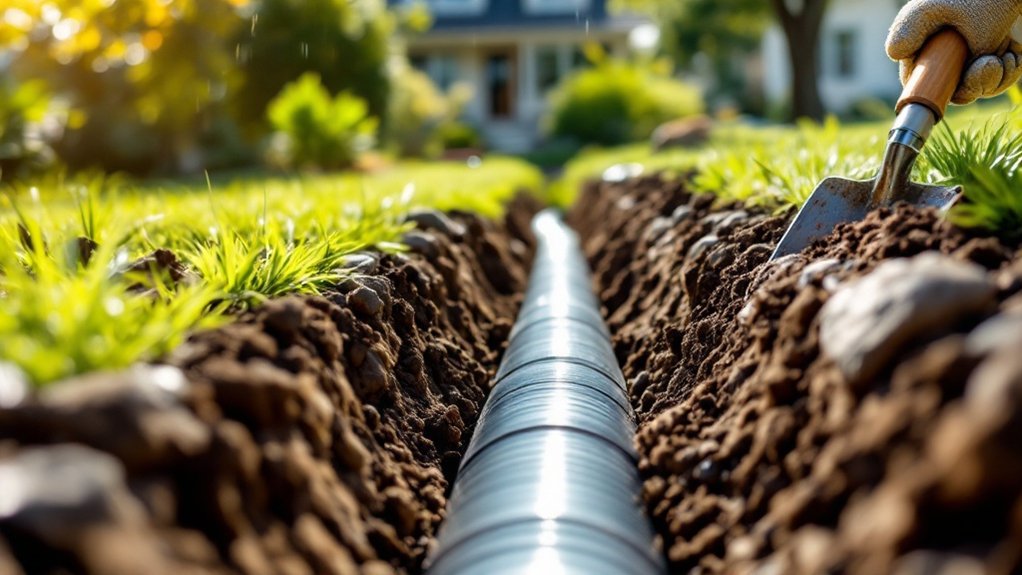
Digging the Drainage Trench
After marking your drainage route, it’s time to break ground on your trench. Begin excavating from the discharge point, maintaining an 18-inch minimum depth and consistent slope throughout.
| Soil Type | Technique | Tool | Trench Safety |
|---|---|---|---|
| Sandy | Gentle loosening | Trenching shovel | Wear gloves |
| Clay | Score first | Pickaxe + shovel | Add supports |
| Rocky | Remove obstacles | Pry bar | Inspect edges |
| Loamy | Quick digging | Trencher | Mark utilities |
Measure depth regularly using stakes and string to guarantee proper gradient. Keep the trench width sufficient for your pipe diameter plus fittings. Remember to adjust for underground obstacles and maintain trench safety by identifying utility locations before digging.
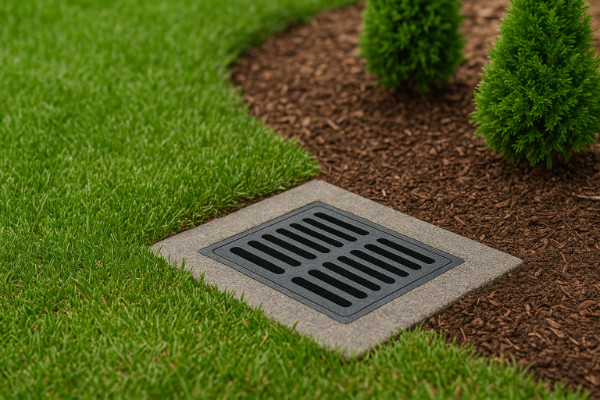
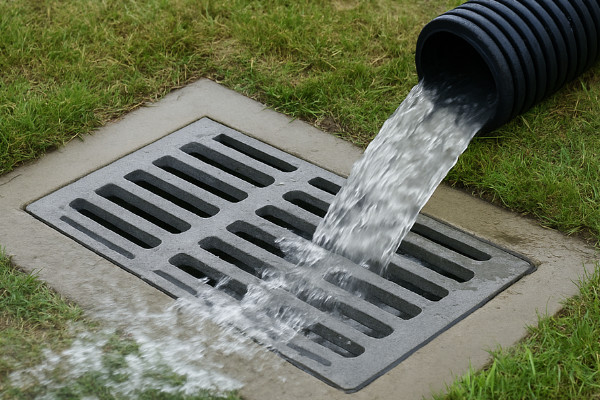
Setting Up the Catch Basin
Once you’ve dug the trench, focus on placing your catch basin at the lowest point of your drainage area where water naturally collects.
Secure the basin on a 6-12 inch gravel base for stability, ensuring it sits level with the surrounding ground surface.
Connect your drainage pipe to the basin using appropriate fittings and waterproof silicone sealant to create watertight connections that prevent leaks and maintain system efficiency.
Proper Basin Placement
The proper placement of your catch basin is critical for ensuring effective water collection and drainage. Position the basin directly on your prepared gravel base, ensuring it sits level and stable.
Set the grate flush with or slightly below ground level to facilitate water entry. Orient the basin’s outlet toward your intended drain pipe direction for straightforward connection.
Verify basin stability by pressing firmly around all sides—it shouldn’t shift or wobble. Proper grate orientation matters; align it to optimize water capture from surrounding terrain.
Confirm the basin is seated securely before proceeding to prevent shifting during backfilling operations.
Connection and Fittings
Establishing a watertight connection between your catch basin and drainage pipe forms the foundation of an effective gutter system.
Apply clear silicone around the basin’s exterior hole before inserting the outlet pipe and twisting to lock it securely. Choose proper-sized fitting types compatible with your system to guarantee leak-free connections.
Maintain consistent pipe alignment with a minimum 1% slope away from the basin for maximum water flow. Use elbows and adapters where needed to navigate directional changes.
Verify all joints are tightly sealed with waterproof sealants. Drill small drainage holes in the basin’s bottom to prevent water accumulation.
Installing the Drainage Pipe
After planning your route and digging the trench according to specifications, you’ll need to properly install the drainage pipe to guarantee effective water flow away from your home’s foundation. Proper pipe installation techniques assure longevity and functionality of your drainage system.
| Step | Action | Material | Purpose |
|---|---|---|---|
| 1 | Lay gravel bed | Gravel/sand | Support pipe and prevent settling |
| 2 | Connect sections | Couplers/elbows | Navigate direction changes |
| 3 | Maintain slope | Level | Assure 1-1/2″ per 10′ slope |
| 4 | Seal connections | Silicone | Prevent leaks |
Apply consistent downward slope throughout installation. Test water flow before backfilling to confirm proper drainage. Seal all connections thoroughly to prevent leakage and future system failures.
Creating the Discharge Point
Proper discharge point installation represents the critical final step in your gutter drainage system. Position the outlet at least 10 feet from your foundation to prevent water infiltration and potential damage.
Ensure adequate discharge distance by maintaining a consistent slope of 0.5 inches per foot. This slope requirement prevents water from pooling or backing up in the system.
Consider using a pop-up emitter or grate drain for the terminus, which allows efficient water dispersal while complying with local regulations.
In colder climates, select freeze-resistant materials and design the discharge point to prevent ice blockages that could compromise your entire drainage system.
Maintaining Your Gutter Drainage System
Regular maintenance of your gutter drainage system serves as the cornerstone of protecting your home from water damage and foundation issues.
Proactive gutter care defends your property against costly water damage and structural deterioration.
Conduct drainage inspections biannually—spring and fall—checking for leaks, loose joints, and sagging sections. After storms, perform additional assessments.
Clean gutters twice yearly, removing debris with a scoop and flushing with water.
Clear clogged downspouts using plumbing snakes or by disassembling sections. Ascertain downspouts extend at least 3 feet from your foundation.
Apply preventive gutter maintenance by tightening fasteners, repairing sagging sections, and installing gutter guards to minimize debris accumulation.
